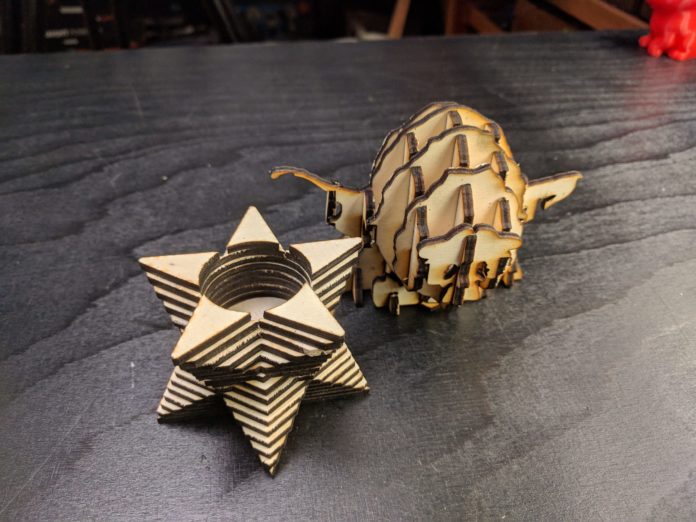
With a 3D printer, it is straightforward to create complex 3D shapes. However, the problem is that you are limited to plastic. If you want your object to be made from wood, for example, you are out of luck. If you own a laser-cutter, though, it is quite simple to process a 3D model in a way that allows you to assemble it from 2-dimensional pieces. The only thing you need is the right software to do the heavy lifting for you. The program we will take a look at here is Slicer for Fusion 360. It is meant as an addition to the CAD program Fusion 360 but works as an independent piece of software.
To start, you can download Slicer for Fusion 360 for free from the Autodesk website. After installing it, you are greeted with a quite simple layout. On the top left, you can import your 3D model in either stl or obj format, and then you simply work your way down in the menu on the left.
The first thing you want to do after importing the model is defining the material you are going to use. You can either choose one of the predefined options or add your own. You specify the thickness and dimensions of the stock. This will then be used to calculate how many pieces you need and in what shapes they have to be. The dimensions of your stock also influence how many parts are placed on the same board and how they are distributed.
Under “construction technique”, you can choose how you want to build your model. The simplest is to make it from many layers of material stacked on top of each other. This is fairly detailed and will create a dense structure. However, depending on the scale of your model, it will require a large amount of material. If you do not need a solid construction, you can choose one of the other options. They are all variations of having different interlocking pieces that make up the structure in a rib-like fashion. You can choose between grid layout, circular, waves, and more to best suit your particular application.
If you chose the stacked construction, you also have the option to add dowels. This will allow you to locate the pieces to each other and add strength. If you do not add any dowels, the program will automatically add small holes for you to use nails to attach the pieces. If you do not want those holes, a workaround is to insert a dowel that does not intersect with the model. That way, there will not be any holes generated.
If you chose a design that slots together, you also have the option to change some parameters that influence the generation of the design, such as the number of ribs. After you are happy with how the preview looks, you can go to the last menu item to export your design in your preferred format for cutting on the laser. As there are quite some features lacking in Slicer, you might want to modify the exported files a bit further before cutting them on the laser. For dxf files, you can import them into Fusion 360, make your changes, and then export the sketch once again.
With this knowledge, it should now be easy for you to create stunning and useful 3D objects using sheet material and laser-cutting. There are also other ways to create these models, that give you more customizability. However, many of them require expensive software, whereas this option is done entirely in free software for hobbyists and should be quite straight forward to follow.
Learn more about Endurance Lasers here
Follow Endurance’s community on Twitter
Contact us if you have any questions:
skype: george.fomitchev
+1.239.302.0053
+7.916.225.4302 (Whatsapp, viber)


