By Zach Murphree, Vice President Technical Partnerships, VELO3D

Measuring before, during and after a part build
Repeatable part quality is the holy grail for the metal additive manufacturing (AM, aka 3D printing) industry. The aim is to match the reliability and performance seen in traditional manufacturing methods like machining or casting.
The continued, successful growth of AM (a market that passed $10 billion in 2019)—in both series production and direct part replacement—now depends largely on quantitative quality measurement and dependable machine-calibration. Even the improving cost-efficiencies of AM won’t advance the process much if component behavior can’t be fully understood and trusted in mission-critical applications or across mid-to-high-volume orders.
Pre-build calibration is evolving
The standards and methods of pre-build calibration for metal AM are evolving. NASA, ASTM, SAE, AWS, and API, among others, continue to refine their requirements to reflect the increasing capabilities of the machines themselves to observe their own bui ld performance. However , NASA guide line MFSC-SPEC-3717 (written in 2017) states that “calibration is effective only when maintained continuously. For pragmatic reasons, confirming calibration is not feasible on a pre-build basis. This time-based calibration interval [at least every 90 days] is set as a compromise between production efficiency and process assurance.”
This compromise is one that needs to be mitigated for AM to be considered mature. As machinists, welders and casters know, many processes must be monitored in as close to real-time as possible. Not in days or weeks; too much is at stake. Yield rates alone will determine whether a bid price is met and if product can ship on-time, profitably, and as a full, not partial, order. Consistent quality dictates product safety and impacts customer value, brand identity and warrantee exposure.
Manufacturers have made efforts to place cameras and sensors inside AM equipment to gain insight into what exactly is going on within the build chamber, but generally the onus is then on the user to establish thresholds and control limits for each specific parameter. These metrics are often not immediately actionable, nor do they help correlate the chamber physics as an interrelated date set. In many current machines, devices have been added onto an existing AM architecture; tradeoffs can abound in their placement and usefulness. While this is an initial step toward greater insight into what makes a quality, repeatable build, AM must make a further leap and marry data science to material science. A modern AM system is capable of burying the user in data, but this has not had a significant effect on the user’s confidence in the part quality at the end of the day.
Material and process considerations
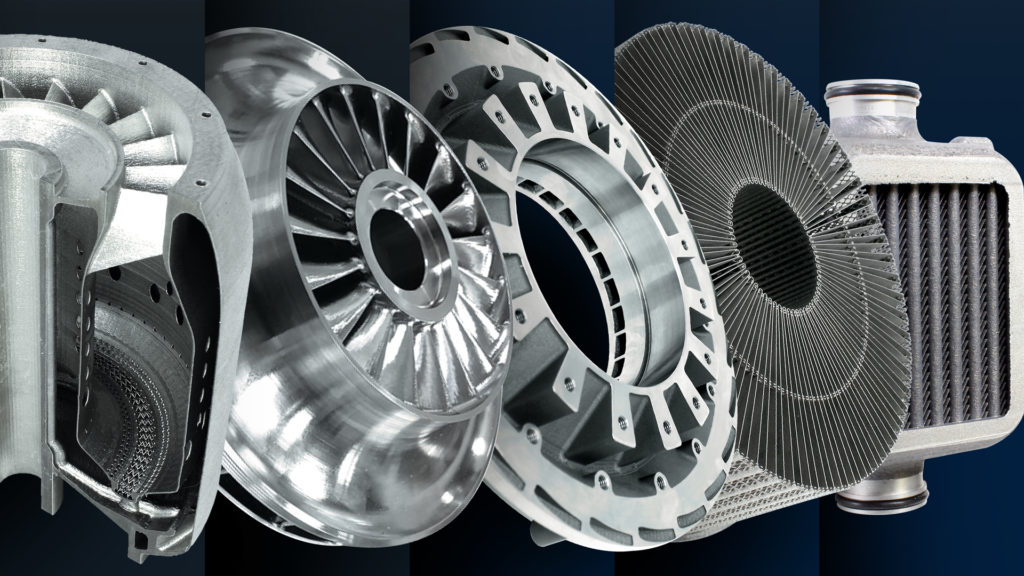
Metal powder feedstock for 3D printing is widely produced and generally very well characterized before reaching the printer. There are a number of ways suppliers create powder. Atomization (generally via gas or plasma methods) provides high-purity, spherical material of predictable size and layering performance. Extracted from wire, bar, or ingot metal stock, many proven and certified metals have been developed for AM, along with custom, super-alloys designed to meet the requirements of a specific application, say for oil & gas or aerospace, with select corrosion or strength characteristics. Keeping a diversified supply chain of reliable suppliers is always a sound idea. Powder suppliers provide a stable element in the AM quality movement that closely resembles traditional manufacturing.
Optics are critical to the metal AM micro-welding process. Most engineers are now familiar with the micron-scale of the powder layers involved, each literally welded onto the next. Systems of one-to-four lasers fuse metals with extreme precision; these must be perfectly aligned, directed to the right place and at the proper speeds to create the precision thickness and consequent metallurgy necessary for a quality part.
Challenging part geometries and wall angles and heights make calibration even more important. Rough surfaces and porosity can be an outcome of poor process-design set-ups for the build, but also of poor optical settings. Again, the standard today is a 90-day calibration of AM machine optics, often done by placing an anodized aluminum plate (or thermal paper) in the build chamber set to a very precise height to provide comparison metrics. Lines are burned into the plate and inspected via an optical Coordinate Measuring Machine (CMM). This is a time-consuming, manual, often-iterative process that can generate its own errors. This extends the scheduled downtime, something no shop floor or service bureau wants for its most expensive equipment.
As found in other manufacturing-process sectors, the AM industry is moving toward more real-time test solutions—with the most advanced machines available today able to automate the collection of a variety of metrics in the pre-build stage, ranging from beam stability, laser alignment and focus to atmospherics and powder bed statistics. This allows the establishment of control limits that guide each aspect of system performance and part creation. It also provides for the most advanced in-situ, real-time metrology environment in the industry.
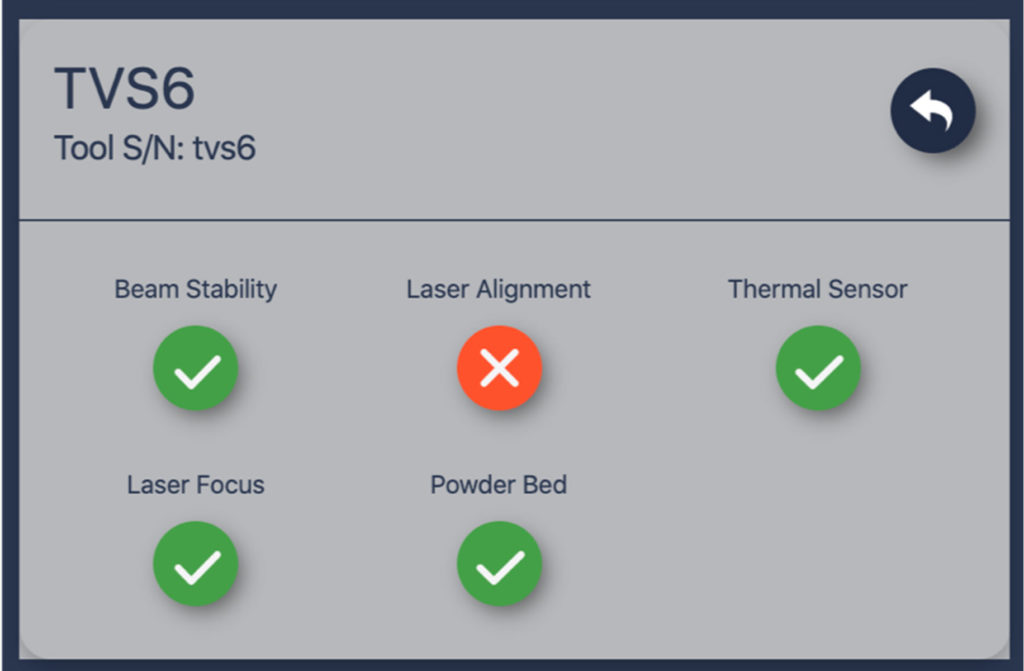
Power-bed control is just as integral to part quality as laser-beam accuracy. Thickness and uniformity of the powder bed allow properly calibrated lasers to create melts that avoid porosity, excess vaporization and mechanical properties that are not in spec.
The recoater systems that put down each successive layer of powder need to be calibrated as well. Currently, the industry recommendation for these is every 180 days. If that timeline is followed, much can go wrong in the thousands of layers put down in even the smallest of parts. Incumbent AM systems do not yet have a quantitative means of actively monitoring the effects of recoater damage o r imp roper powder dispensing.
Post-build inspection of parts has become more of a priority, either via dye-penetrant testing for potential crack initiation in fatigue-critical applications, CT-scans for porosity and other flaws, or destructive testing. Full inspection is the norm with much of the
current AM equipment, although the desire is to be able to move to batch inspections. The majority of data analysis is used to validate and determine parameter settings for lasers, powder beds, feeds and other operat ions after the product is made, not during the critical manufacturing process.
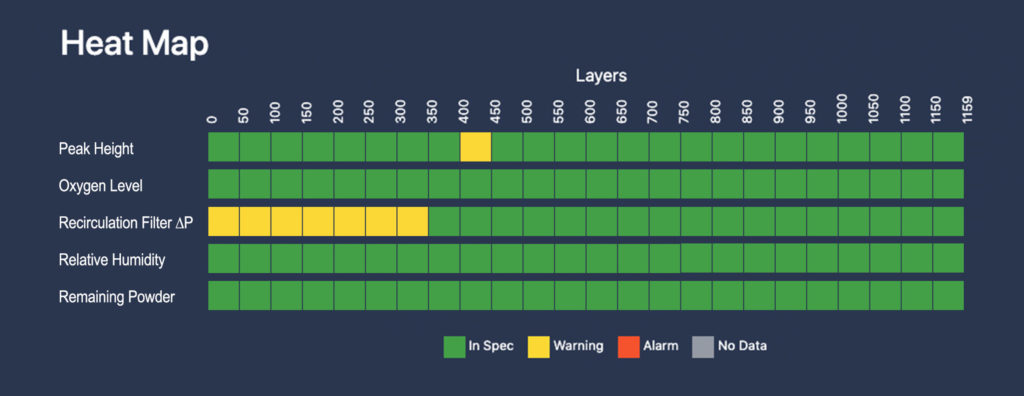
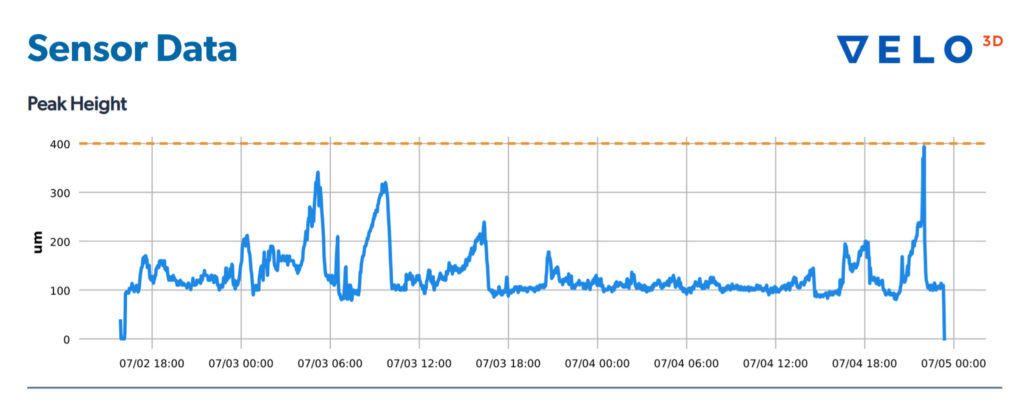
The latest systems, however, include not only melt pool metrology, but also height mapping that surveys each layer of the build in-progress against the position of the bed, as well as in-situ checks of cal ibrations and performance. All of this data is captured in a comprehensive build report for traceable quality.
The relationship between calibration and quality
There are many types of additive or 3D printing systems in the world. They use materials from metal to plastic to composites to concrete. All have performance objectives and tolerance limits that must be satisfied in order to meet quality requirements for safety and/or market acceptance. Advanced metal Laser Powder Bed Fusion (LPBF) machines are arguably one of the most complex and dynamic of these systems due to the nature of the materials involved, the stresses induced by welding, the high operating temperatures and certain metals’ sensitivities to environmental factors.
LPBF is becoming key to expanding industrial applications in nearly every market that uses metals—all-important in mission-critical applications such as space, defense and aviation, medical and oil & gas. What’s more, on-demand, direct-part replacement in small lots for Maintenance, Repair and Operations (MRO) has the potential to determine the economic health of whole industries, as casting and tooling suffer from restrictive investment barriers outside of full production. All these industries are dependent on parts of certified quality— which is where opportunity and actuality intersect.
As AM breaks through with new paradigms in innovation and performance, provable quality of individual parts is critical. This can only be achieved through a vigorous combination of data acquisition and applied material science. That is, sensors, cameras and software for capturing, measuring and monitoring quality metrics that can zero in on any moment and aspect of production, report that data and synthesize the outputs for insights into continuous process improvement.
Derived from lessons learned from the highly exacting semiconductor industry, those calibration benchmarks for AM are now being met and refined by the most advanced 3D-printing systems. In terms of quality, function and volume production, this should be very encouraging news for those seeking certified AM product solutions.
ABOUT THE AUTHOR

Zach Murphree, Ph.D. is VELO3D’s VP of Technical Partnerships. His background includes engineering roles for energy companies, where he was in charge of introducing metal additive manufacturing technology to a Fortune 500 energy company. He earned Bachelor of Science and Ph.D degrees in Aerospace Engineering from the University of Texas and has been granted more than 35 patents.

