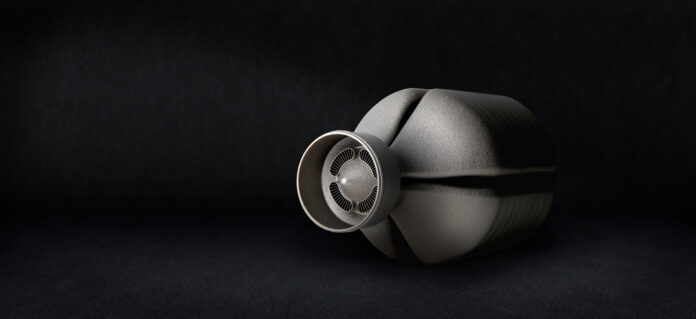
Heat exchangers’ design has not significantly changed in decades – until Additive Manufacturing comes into play. AM comes with a freedom of design that can be exciting and…intimidating. At first, one might get excited about the ability to deliver complex shapes with the technology, and thereafter, wonder if it will pass the “qualification & certification” test.
As said in this dossier about “Qualification & Certification: Their Differences & Next Challenges for Additive Manufacturing”, what makes an additive manufacturing-based application viable for a given industry, is a pivotal end-to-end qualification and certification process. The thing is, to perform such process, several frameworks can be required, and sometimes they vary from one manufacturer to another.
So, what would be the procedures that could be explored to qualify and certify additively manufactured heat exchangers?
Qualification and certification are very different – If you have any doubt about their differences, I strongly suggest you read the article linked above (and here) on “Qualification & Certification”.
As far as heat exchangers are concerned, their manufacturing can raise atypical challenges due to the fact that – for instance – a single defect or pinhole in a thin-wall, gas-tight structure can influence the functionality of the designed device and affect its ability to perform well. Not to mention that requirements for part certification are dictated by industry specific standards that already exist.
At present, knowledge of AM qualification is very much dependent on holistic experience, hence the various approaches that are explored by OEMs.
However, we do need to acknowledge the fact that part qualification involves many variables that range from the industrial 3D printer itself and its settings, the design and material leveraged, to the operator producing the part. One of the most complicated processes here is probably to qualify the printing requirements. Remember? That’s what manufacturer of 3D printed heat exchangers Conflux Technology told 3D ADEPT Media in the July-August edition of 3D ADEPT Mag (pp 21). Indeed, the successful filing of the 3D part data file helps to ensure consistencies in part manufacturing.
Moreover, a part is considered to be qualified when the data file is created by a qualified part designer and the part is defined by the settings and parameters. This guarantees that the engineer/operator that will 3D print the part from the online library will achieve the same quality part.
The part certification on the other hand, often lies in its inspection and utilization of a NDE technique such as radiography to ensure everything is right with the necessary internal components and that there are no errors. However, one thing that is often underestimated here is the manufacturing purpose. It’s crucial to determine if the additively manufactured component is meant to be a permanent replacement, a temporary replacement or a new prototype or modified part. Different part categories will require different levels of evaluation. Some parts need more evaluation than others, hence the need to have a system in place.
One thing I will keep from Conflux Technology again, is their use of CT scanning as an essential validation tool. Those who are used to manufacture heat exchangers using traditional manufacturing processes may be used to these tools. According to Conflux, it is expensive, produces a vast amount of post-processing data – which is time consuming to analyse – but it remains pivotal to inform and speed up their development cycles while providing confidence that the parts are free of powder and critical defects.
After what ZEISS shared with 3D ADEPT Media on “Quality Assurance Control | Metrology and Inspection for Additive Manufacturing”, one may advance that X-ray Techniques and thermal imaging technologies could provide great insights into the detection of internal structures or potential voids located inside 3D printed parts.
The main challenge for OEMs right now is probably to provide assurance and confidence about this qualification and certification process. Sometimes it’s about ensuring that all parties involved understand that the nature and position of defects is more critical than trying to remove all of them. And it could also be life-changing to include in the production workflow a range of programs such as computed tomography, process monitoring, performance, durability, and fatigue testing.
We hope to update this article regularly based on part manufacturers’ experience.
Lead author: Kety Sindze. Remember, you can post jobopportunities in the AM Industry on 3D ADEPT Media free of charge or look for a job via our job board. Make sure to follow us on our social networks and subscribe to our weekly newsletter : Facebook, Twitter, LinkedIn & Instagram ! If you want to be featured in the next issue of our digital magazine or if you hear a story that needs to be heard, make sure to send it to contact@3dadept.com


