It is no secret that demanding industries such as medical or consumer electronics often require certification before the use of 3D printed parts in a given project. Several tools including measurement are often used to ensure quality of these parts. The only thing is that, the cycle time to perform precision inspection of rough unfinished parts is often prohibitive.
To address this issue, Hexagon’s Manufacturing Intelligence division has developed a high speed, non-contact sensor for use with coordinate measurement machines (CMMs). The announcement follows the recent launch of REcreate, a new software designed to reverse engineer parts from metrology scan to manufacturable model.
The new non-contract sensor would rapidly inspect delicate parts that feature a variety of surface finishes without applying damaging pressure. Interestingly, the new solution could fit a variety of production parts that are not often fabricated using AM, giving this way the ability to OEMs and contract manufacturers to leverage other technologies and materials in production.
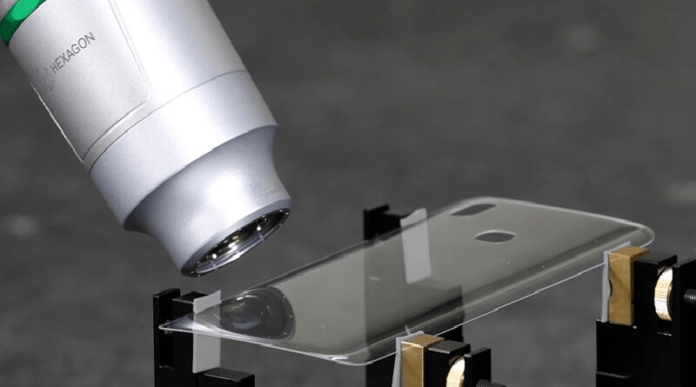
Named “HP-OW chromatic white light sensor”, Hexagon explains that the sensor can measure components with transparent, polished, rough, and matte finishes. It would also quickly and accurately measure parts made with delicate materials such as electronics components such as LED vehicle lights and solar panels. Non-contact capabilities also offer high throughput inspection of medical devices, such as surgical implants, where every part must be inspected with high accuracy.
Wolfgang Madlener, VP machine tool and sensor devices, said, “We are excited to introduce these highly specialized sensors to address the need for continuous sampling at high accuracy and speed. We recognise that our customers need new approaches to address evolving product designs, manufacturing techniques and the agility to address new markets. It’s a given that the CMM must be accurate – what’s important today is that this valuable asset can be adapted to solve each new challenge with the best available sensor and software combination for the measurement.”
Compatible with Hexagon’s GLOBAL S and OPTIV M CMM lines, the new chromatic white-light sensor can be completed by two new touch-trigger probes, that offer manufacturers robust high-accuracy measurement of delicate parts. Ideal for novice to experienced users, the highly durable HP-THDe is a modular touch-trigger probe that delivers superior repeatability, adaptive triggering, and faster stylus-change capabilities compared to common touch-trigger probes. Also suitable for non-experts, the highly durable HP-TMe touch-trigger probe is available in four versions that offer a range of measuring forces to suit a broad range of application requirements.
The ability to automatically switch between tactile and non-contact sensors in response to changes in application accelerates the inspection of a wide range of parts with different material types. For a part such as a windscreen, where multiple different measurement techniques are required for the inspection, the overall process efficiency can be improved by automating inspection from start to finish with a sensor-changing rack. Updates to Hexagon’s PC-DMIS metrology software support the new sensors and enable the efficient programming of multi-sensor inspection processes, including rack automation, from a single pane of glass.
Remember, you can post job opportunities in the AM Industry on 3D ADEPT Media free of charge or look for a job via our job board. Make sure to follow us on our social networks and subscribe to our weekly newsletter : Facebook, Twitter, LinkedIn & Instagram ! If you want to be featured in the next issue of our digital magazine or if you hear a story that needs to be heard, make sure to send it to contact@3dadept.com


