Major updates improve usability, speed and accuracy of non-destructive testing, analysis and geometry repair of parts from injection molding, casting or 3D printing
The latest version of Volume Graphics’ high-end CT data analysis software suite, version 3.5, brings enhanced capabilities to manufacturers looking for better ways to inspect parts and improve designs—however they are made.
Particularly in the automotive, aerospace and defense industries, engineers exploring novel materials and manufacturing methods are increasingly turning to CT scanning to achieve a more accurate, non-destructive evaluation of product robustness and performance. Volume Graphics is a leading developer of software technology that interprets CT data from scans of almost any material to detect, analyze and visualize minute structural deviations that might affect part quality.
Version 3.5 now provides even more powerful automated design-geometry adjustment and repair tools that can be used to correct and/or offset issues that stem from the manufacturing process itself. Moldmakers, casting shops, and additive manufacturing (AM, aka 3D printing) providers alike can employ the software to detect and visualize material and/or design defects or distortions—and then employ sophisticated capabilities to correct their CAD designs, compare values against nominal limits and ensure that final part quality meets applicable industry standards.
Here are some of the highlights in version 3.5 of Volume Graphics’ CT data analysis software suite (which includes VGSTUDIO MAX, VGSTUDIO, VGMETROLOGY, VGinLINE, and myVGL):
· A Completely Reworked Manufacturing Geometry Correction Module.
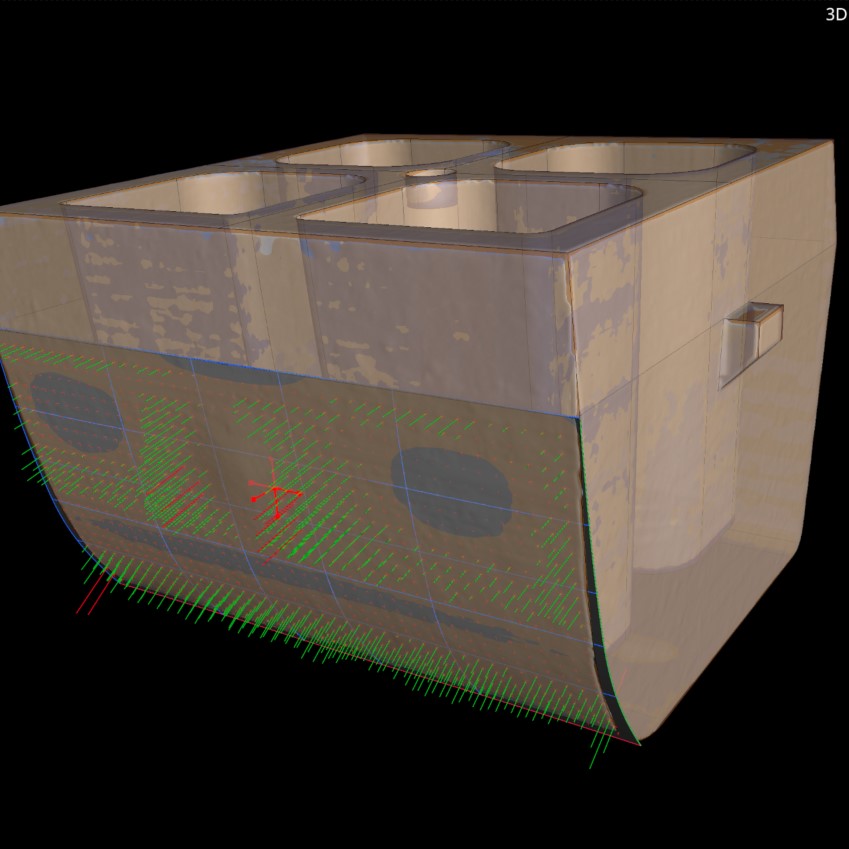
This software module benefits all those who work with some kind of mold, i.e., injection molders or casters. Enhancements in usability, with continuous updating and feedback on quality, give the CAD designer valuable information that can be used to improve manufacturability. Filtering out points that can cause erroneous compensation results, the software fine-tunes surface fitting and provides compensations that are within tolerances, enabling the user to immediately see if their design changes are compatible with mold-making. [Image 1]

Image 1: Manufacturing Geometry Correction Module. When compensating a geometry, a new filter option in Volume Graphics’ industrial CT software version 3.5 allows users to find fit points that cause inaccurate compensation results.
· Enhanced Mesh Compensation.
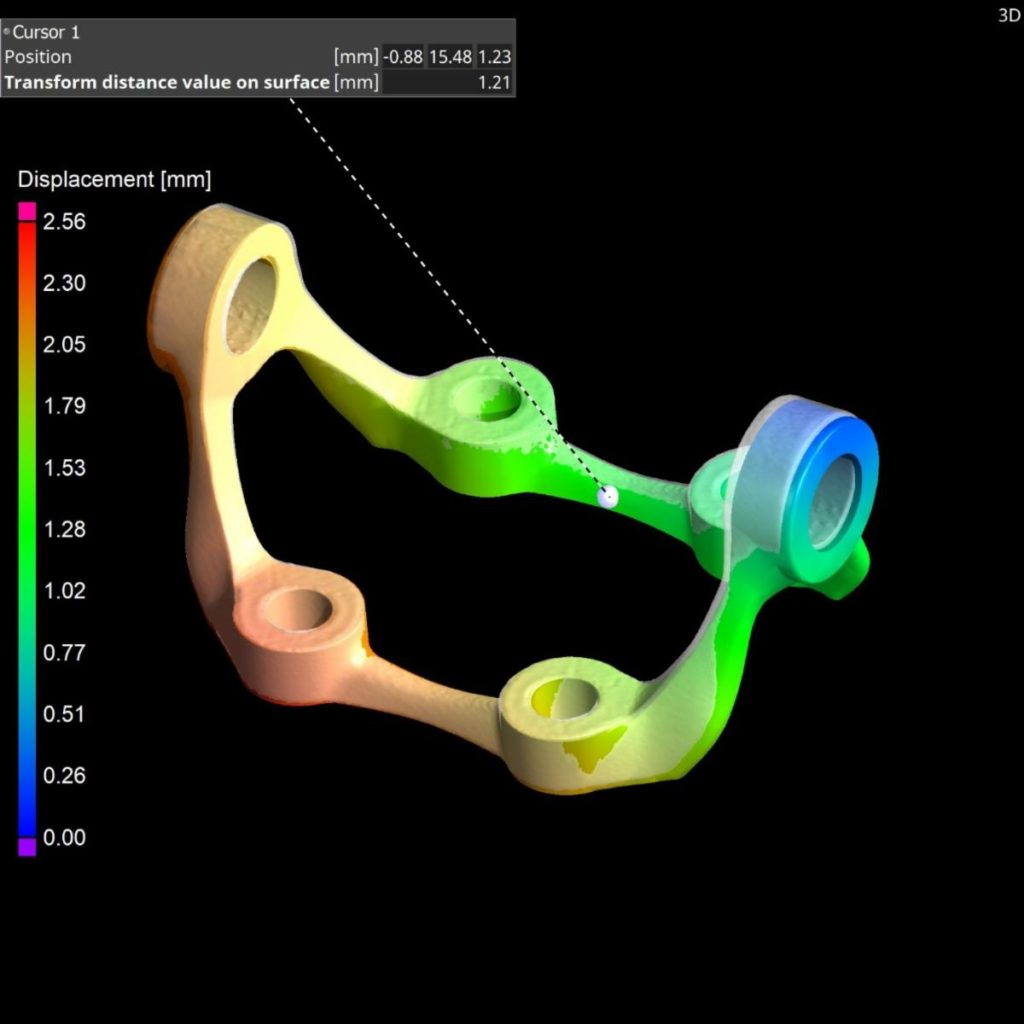
For those working in simulation and AM/3D printing, this module now provides easier navigation and understanding of the relationships between elements for better interpretation of part warpage, deformation and displacement—and automatically compensates designs to correct for such deviations from manufacturing intent. Mesh updating is 10X faster, with improved results when scan and reference objects differ greatly in size or show other significant deviations. There are a greater number of control points for more granular and accurate results. In the case of lattice structures and other complex geometries, a uniform control-point placement function ensures full analysis of a design. The software can also shorten the 3D-print-and-test process by automatically running two sequential design-compensation results to move a design for AM closer to nominal before the first print. [Image 2]

Image 2: Enhanced Mesh Compensation. A new compensation mesh color overlay in Volume Graphics’ industrial CT software version 3.5 helps users to clearly visualize, analyze and annotate any displacements in the compensation mesh.
· New Porosity and Inclusion Analysis of Castings.
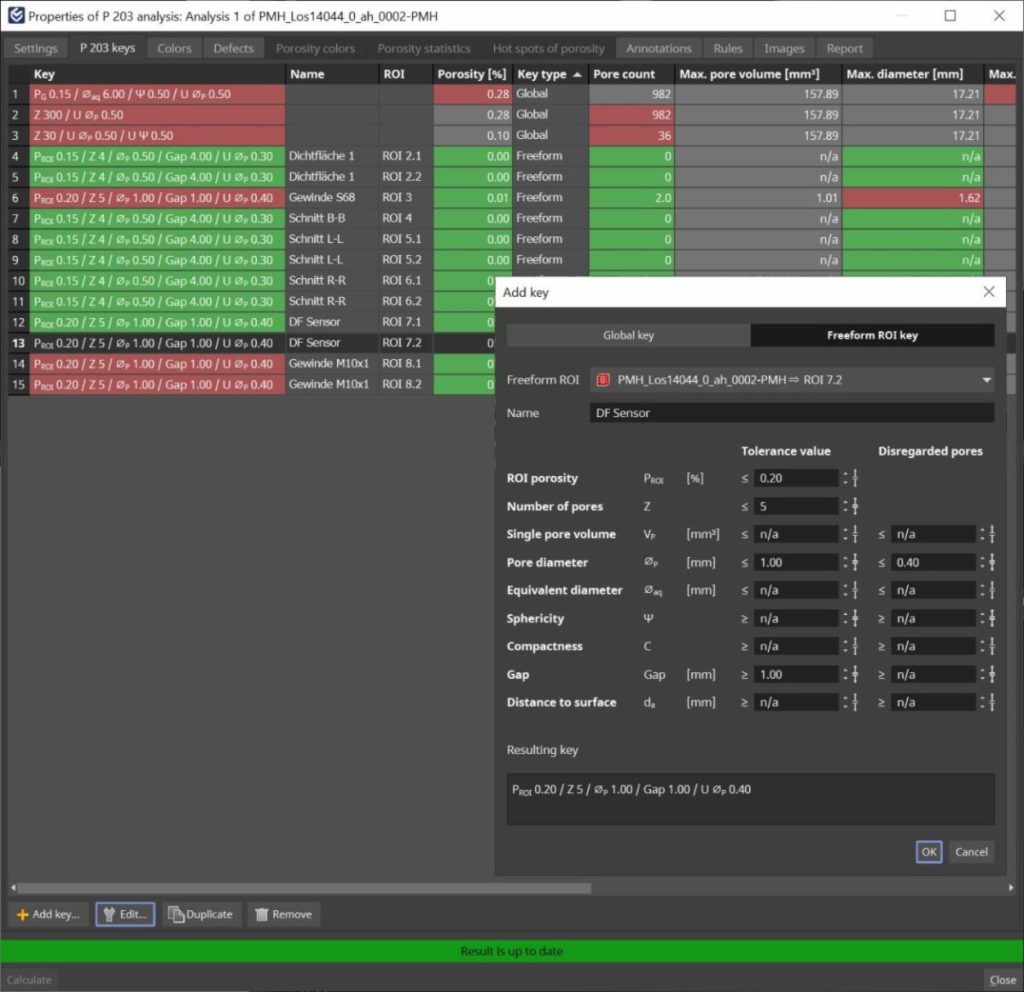
This is one of the most significant features in Version 3.5—CT scans of cast parts can now be inspected for porosity and compliance with Reference Sheet P 203 of the Federation of German Foundry Industry (BDG). With the help of the BDG P 203 porosity key, users can perform a 3D evaluation of detected volume deficits both in the complete casting and in freely defined sub-areas, such as functional areas with special attributes. The software enables inspection of multiple, different regions of interest in a part to see if porosity is within tolerances and whether there are any post-machining issues in the finished part. The data from this analysis is then ready for Q-DAS process control. [Image 3]

Image 3: New Porosity and Inclusion Analysis of Castings. Usability improvements in the P 203 analysis, in Volume Graphics’ industrial CT software version 3.5, include combining the generation and editing of global and freeform porosity keys in one dialog. A new BDG P 203 name field allows users to add a comment for each porosity key.
Capability enhancements support engineering across many industries
Other enhancements in version 3.5 strengthen existing functionalities that support science, R&D, medical device development and other industries in addition to automotive and aerospace & defense. Among these is advanced reporting, which is now more user-friendly and fully integrated with viewing. The powerful nominal/actual comparison module has also been made more user-friendly with easy-to-understand visualization of deviations of scanned objects from their reference data sets. For a full list and explanation of all the new developments, please see dedicated web pages for VGSTUDIO MAX 3.5, VGSTUDIO 3.5, VGMETROLOGY 3.5, and VGinLINE 3.5.
Remember, you can post job opportunities in the AM Industry on 3D ADEPT Media free of charge or look for a job via our job board. Make sure to follow us on our social networks and subscribe to our weekly newsletter : Facebook, Twitter, LinkedIn & Instagram ! If you want to be featured in the next issue of our digital magazine or if you hear a story that needs to be heard, make sure to send it to contact@3dadept.com


